I am SO HAPPY to finally show off all my hard crafting work from the past month - thank you for being so patient. I had such a good time crafting for the lovely Samsara, and received some incredible gifts in return (photos to come, pending her approval!)
I'm extra proud of this journal. The numbers relate to the percentage of "pea pulp" - the remainder being recycled paper. - from the looks of things, I think the 100 might be closer to 90, but that wouldn't make for a good story now would it!
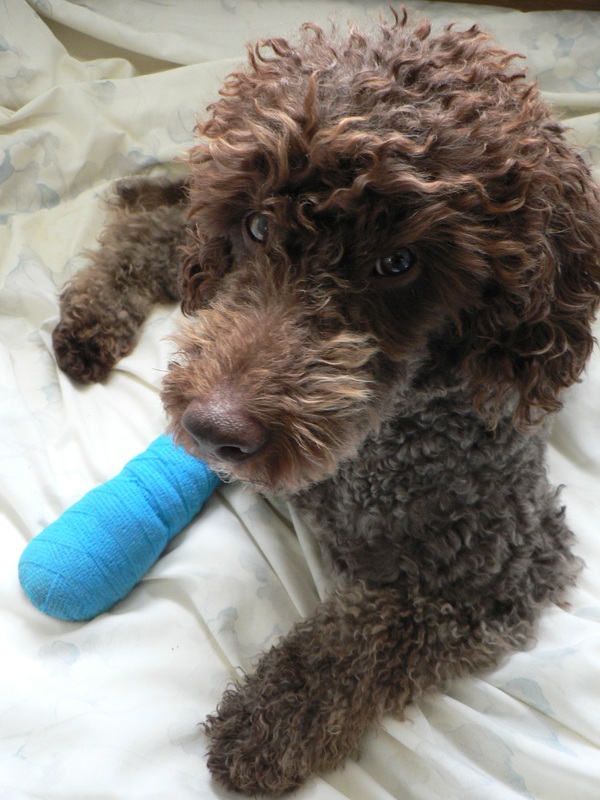
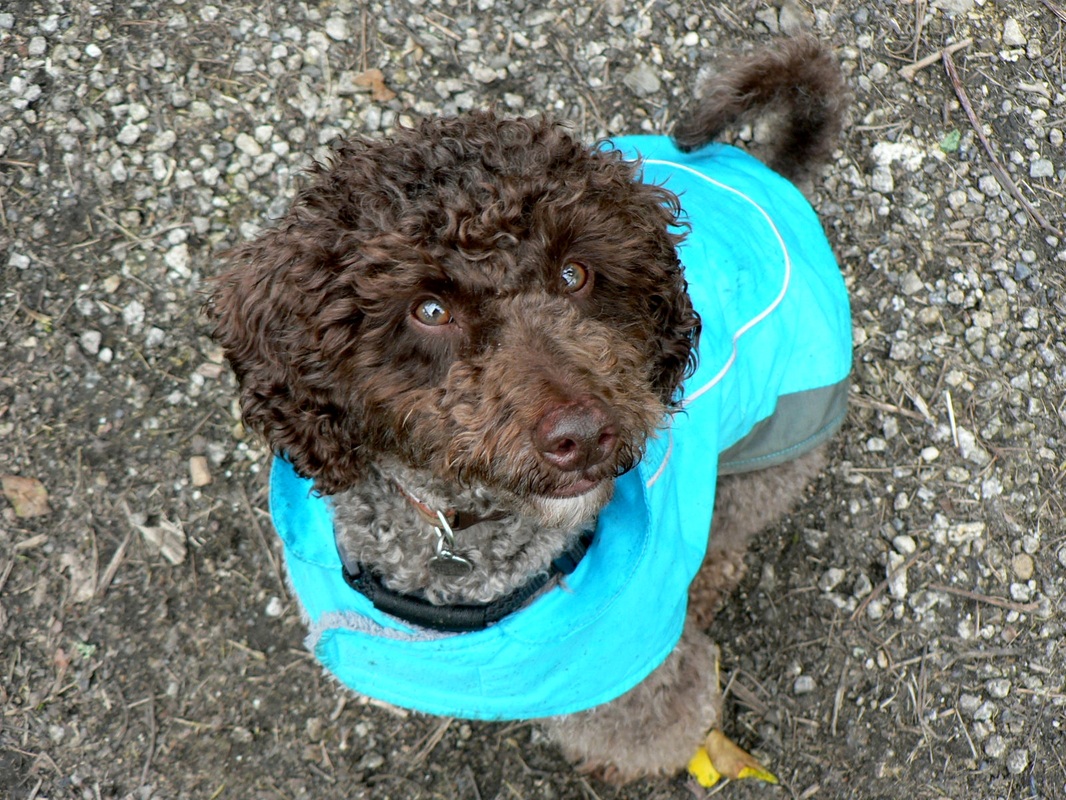
Aww poor puppy! Whisky cut himself on something while chasing a bird up the stream. It was very deep and I had to use my tshirt to clean it up and bandage him on site, before carrying him the half hour walk back to the car. I have to say a huge thank you to my friend who was out with me - and to whoever trained her as a nurse. You kept me from freaking out - thank you :)
He's definitely heavier than he looks! He looks sweet with his blue bandage now though, and the vets think he'll heal without stitches, phew!
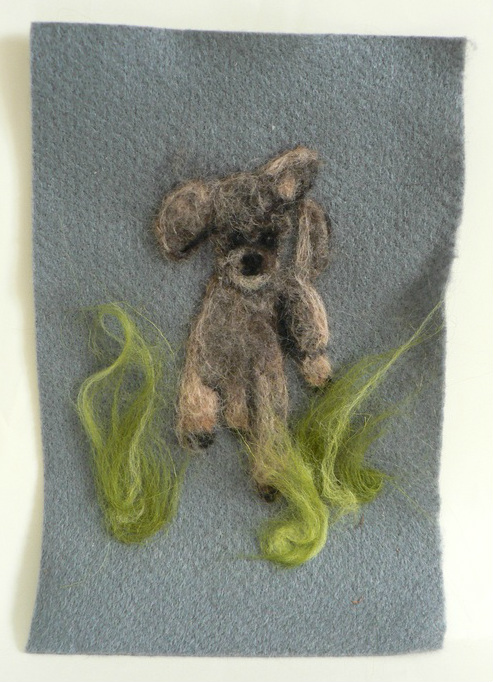
Also, after much advice from the awesome people of Craftster, I've completed my second, much improved, needle felting picture of him.
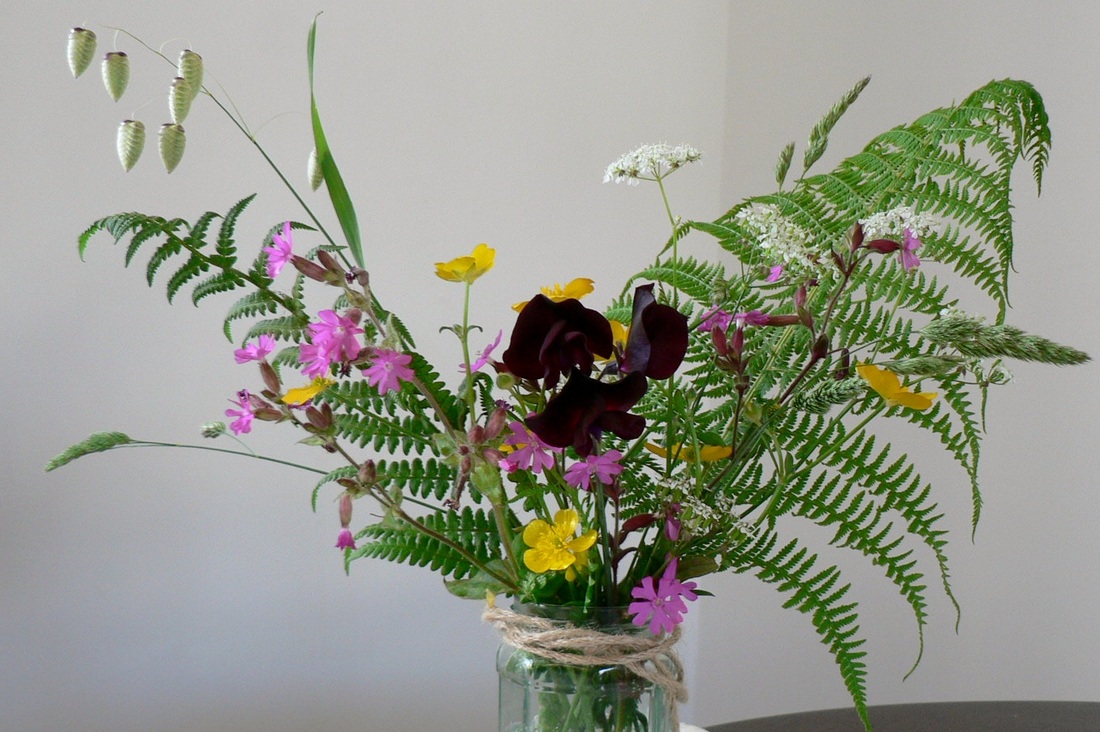
I could not be happier now the flowers are all out. I first had a go at flower arranging a couple of years ago on holiday in Ireland. I love it! It's so satisfying to see the composition come together.
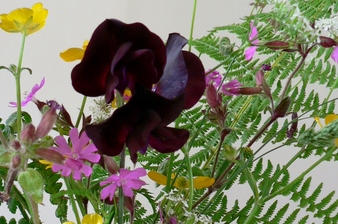
I'm particularly happy that the sweet peas my Aunt gifted to me are ready for picking. They smell divine and have the deepest purple colour, inviting you in for a closer look!
Here is my first wild/home grown flower poesy of the summer. My advice for anyone who would like to give it a go? Don't be stingy on the greens. Including grasses, ferns and interesting leaves is a beautiful way to add interest to your arrangements without overdoing it on the flowers. My second piece of advice is to let go of any fear you may have that other people wont like your arrangement. Go for what you think looks beautiful, and gives you joy! I deliberated for hours on my first arrangement, but I believe that the true joy of the art is found in allowing yourself to be impulsive. After all - it's not going to last forever!
I have found a craft in which I certainly have plenty of room for improvement! Needle felting is such a tricky craft - you place wool roving (free fibres of wool) onto your backing (I've used felt, but you can use anything soft I believe). You then stab these fibres with a felting needle, which has a jagged edge. This fuses your roving with the backing - creating one single piece. I've felted a picture of my lovely Whisky.
I love the softness of this craft, I could cuddle this picture all day long - hehe!
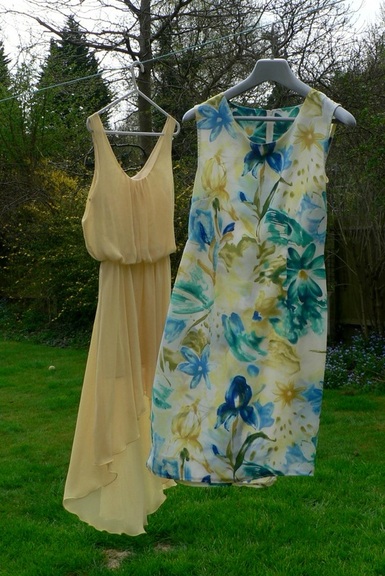
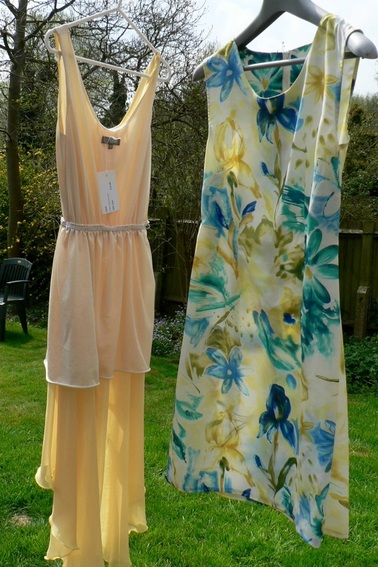
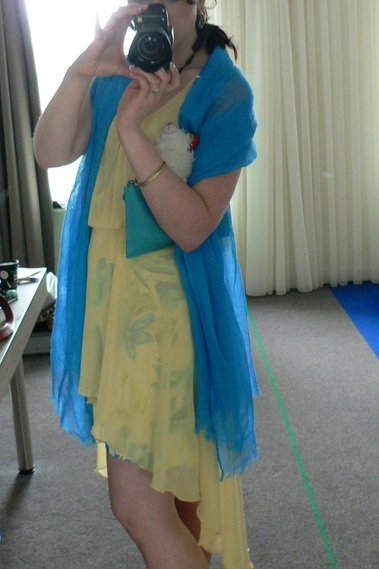
Two pretty dresses... right? Except the yellow's lining barely covers your bottom, and the flowers' neckline is at least 10 years too old for me.
So.. I decided to combine them by turning the flowers into a slip for the yellow.. and walah..
This is the first time I've felt happy about the end result of a clothing project. I've asked for a sewing machine for christmas so I can have another go!! :) Finally.. Whisky's feeling left out with all the photos of Scarlett and none of him!
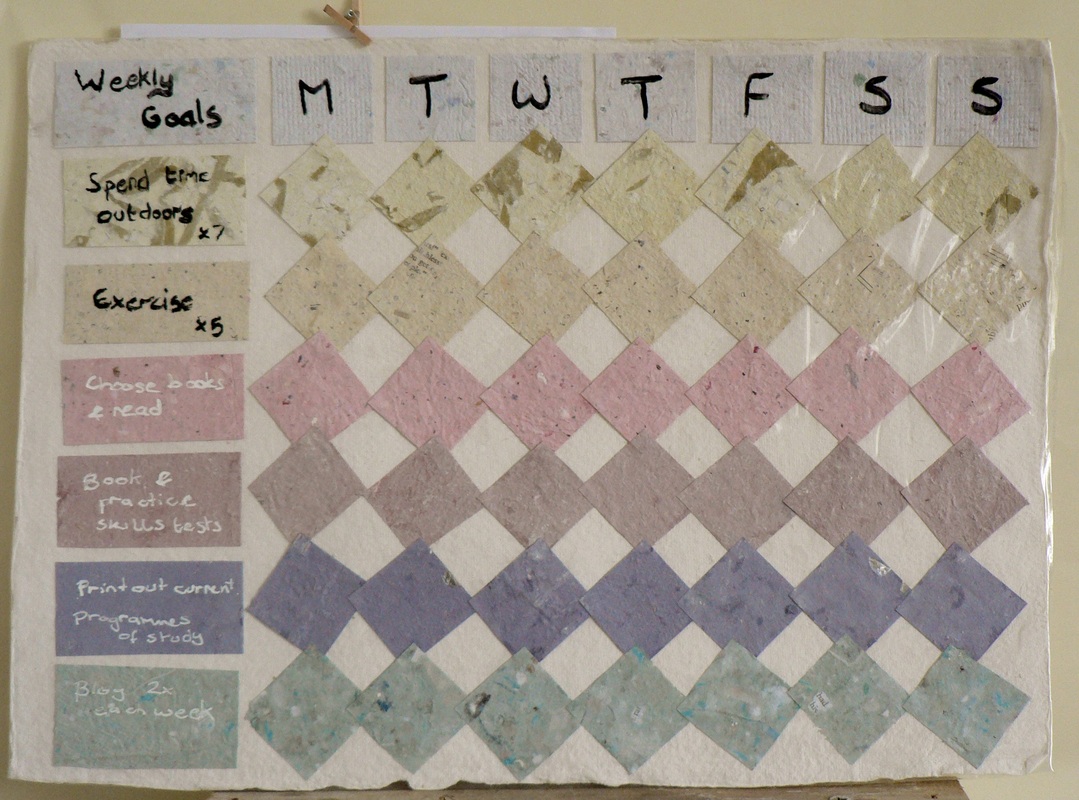
Putting some of my handmade paper to good use in a re-useable goals check list. I'm using eye liner and tipex because dry wipe markers are notoriously smeary, and wet-wipe have disappeared from the shops.
I'm really happy with this project, it allows me to look at my handmade papers every day as well as stay on track with my goals over the next six months, as I prepare for teacher training.
A quick photo tutorial for anyone looking to recycle some tin cans - word of advice, simple acrylic spray paint like the Montana range worked much better than the acrylic spray specifically designed for metal - beware!

 RSS Feed